Shop the TR Solo Neck Lanyard 🠪
*This TR Solo Neck Bungee is not PPE! It is simply an orientation lanyard. Follow all manufacturer instructions for your PPE devices.*
***Always use a backup device, in addition to the device being paired with this lanyard***
***Always double check device engagement after lanyard is attached, and before beginning climbing***
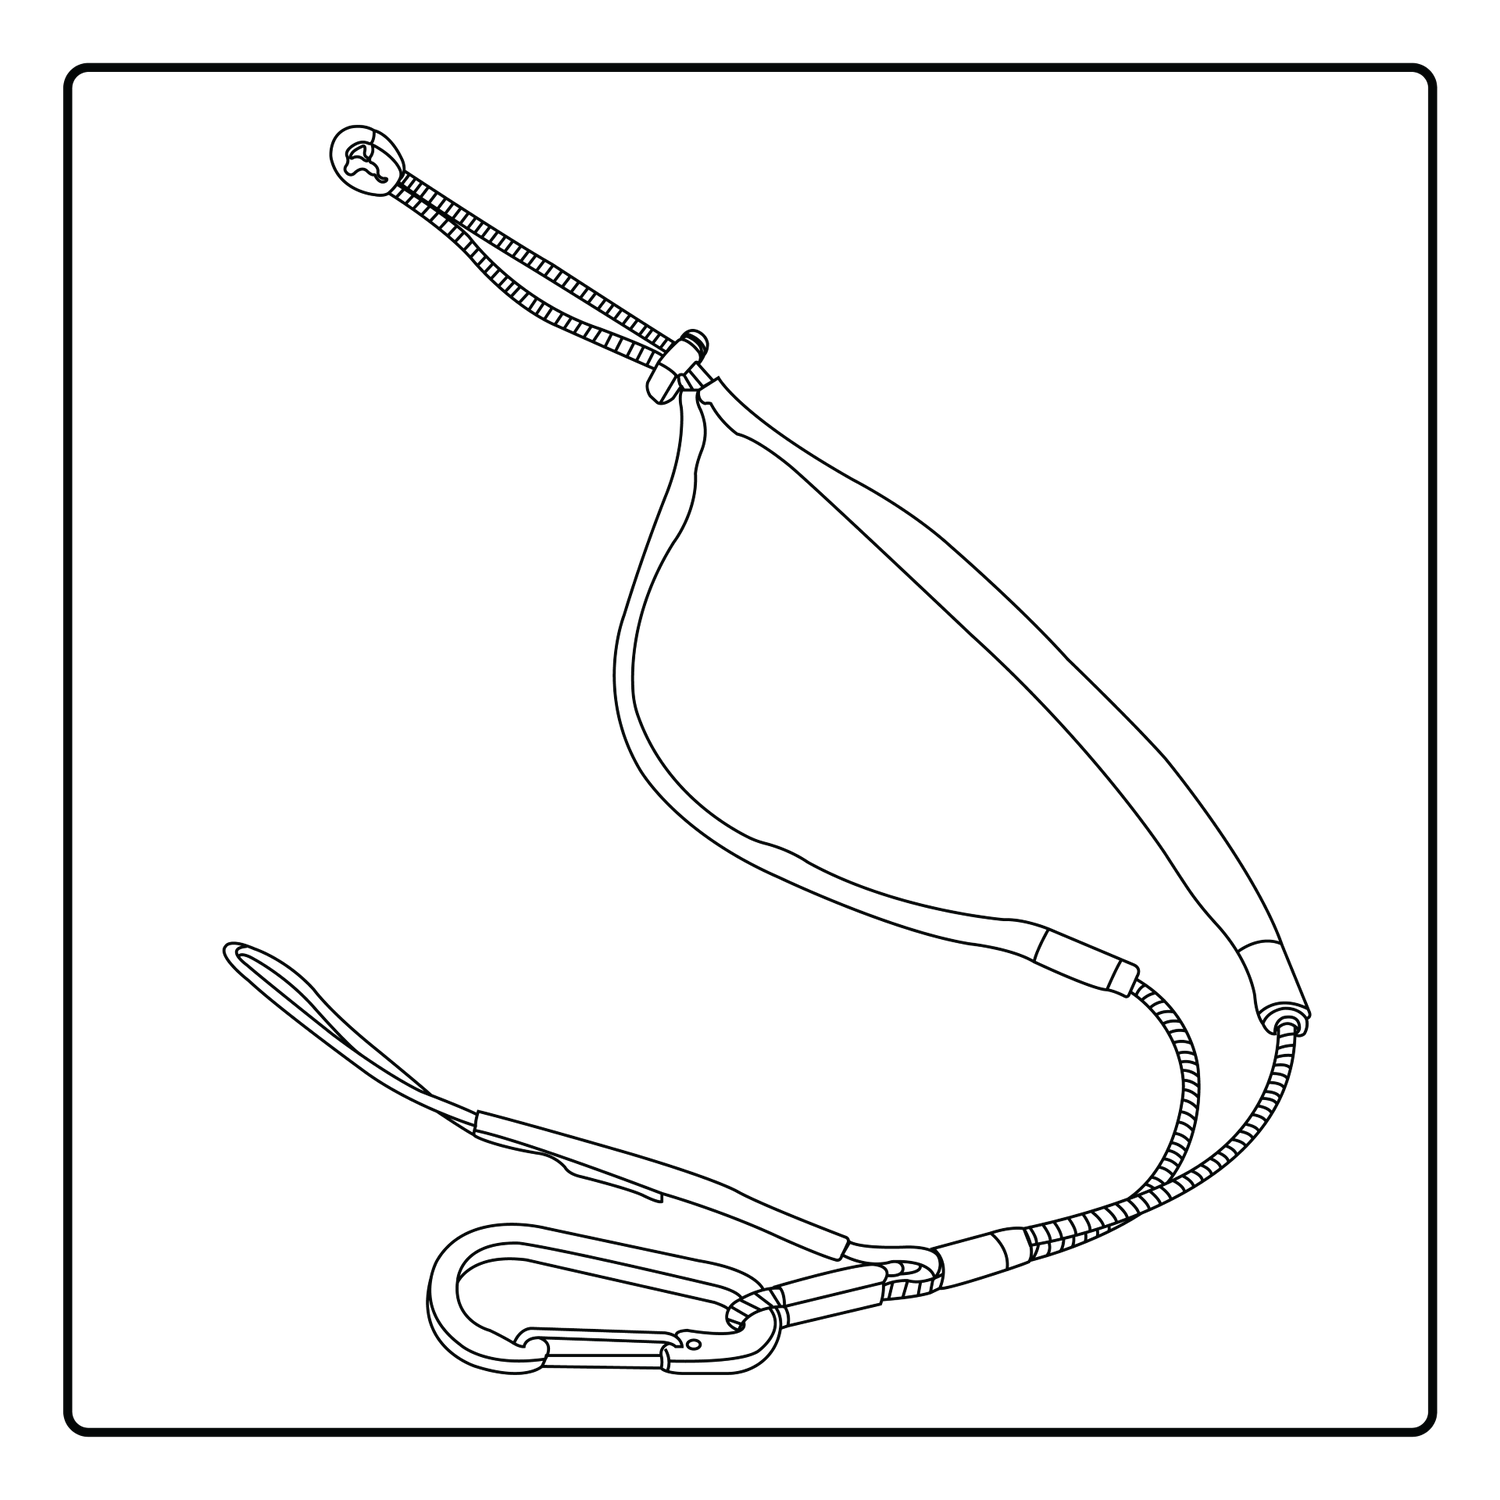
This bungee neck lanyard is used to hold a progress capturing device upwards while top rope soloing. Proper adjustment is required to hold the device snug, straight, and without snags.
Usage Steps:
1. With the slide adjuster slid to the end of the lanyard, put the loop over your head. The smooth black padding should sit behind your neck.

2. Set up your desired TR solo progress capturing devices onto the fixed rope, and securely clipped into your harness

3. Pass the red cord loop through the primary carabiner hole oft your top progress capturing device, and then clip the loop back to the small red carabiner on the lanyard.

4. Use the lanyard slide adjuster behind your neck to cinch the bungee snug for your body size. Ensure there is no lanyard slack for any type of upper body climbing movements.

5. Double check device engagement before setting off up the climb. Always push down on both devices to ensure they grab the rope!
6. Reverse the steps to take the lanyard off. Use the integrated carabiner to rack the lanyard onto your harness.